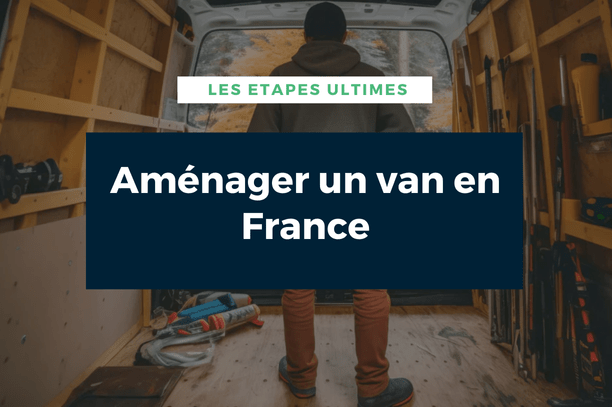
The conversion of a van, a van or a small truck has become a real trend in France in recent years. Whether you dream of trips on country roads, a nomadic lifestyle, or simply an economical solution for camping, transforming a utility vehicle into a comfortable motorhome is an exciting and affordable project!
In this ultra-detailed guide, we accompany you step by step to convert your van in a practical and efficient way. You will discover all the essential van equipment, tips to optimize space, and advice for a fully autonomous trip. 🚀
First of all, a few words about Vanlife Store
At Vanlife Store, we are above all vanlife and adventure enthusiasts! After years on the road living our dream, we love sharing our tips, ideas, and good deals to help you transform your van into a true home on wheels.
We are also conversion experts, which allows us to offer you relevant advice and products for your projects or repairs of converted vehicles, always at the best prices.
Subscribe to our newsletter to receive our best advice, inspiration for your next getaways, and great offers to equip your van. Ready to go on an adventure with us? 🚐✨ Let's go!
- 🏗️ Step 1: Planning and Design – The Key to a Successful Project
- 🛠️ Step 2: Vehicle Preparation – The Foundation of a Successful Conversion
- 🛠️ Step 3: Creating Openings: Windows and Roof Vent for a Converted Van
- 🔥 Step 4: Insulation and Coverings – Optimal Comfort in All Seasons
- ⚡ Step 5: Electrical Installation – Energy Independence for Traveling Freely
- 🚿 Step 6: Water and Plumbing – Essential Comfort in a Converted Van
- 🏡 Step 7: Interior Layout – Optimize Every cm²
- 🎨 Step 8: Personalization and Decoration – A Van in Your Image
- ✅ Step 9: Pre-Departure Checks – Safety and Comfort
Our Vanlife conversion experts are here for you! Whether you have a question about our products or are looking for advice to transform your van into a true nomadic cocoon, contact us – we will be happy to guide you!
🏗️ Step 1: Planning and Design – The Key to a Successful Project

Before even starting the work, take the time to think and plan your project. A well-thought-out conversion helps avoid mistakes and optimize your budget.
❓ Essential questions to ask yourself:
🔹 What will be the use of your van? 🚐🏕️
- Occasional trips (weekends, holidays)
- Nomadic lifestyle (year-round living in a motorhome)
- Modular utility van (work and leisure combined)
🔹 How many people will travel on board? 👨👩👧👦
- Solo, couple, family, pets?
- Number of beds needed?
🔹 What equipment do you want to include? 🛠️
- Kitchen 🍳 (cooking plate, refrigerator, sink?)
- Sleeping area 🛏️ (fixed bed, convertible?)
- Bathroom 🚿 (dry toilets, indoor shower?)
- Electricity and autonomy 🔋 (solar panels, auxiliary batteries?)
- Storage and space optimization 📦
🔹 What is your budget? 💰 (🔥 Promotions for all budgets! Don't miss our special offers 👉 Discover them here 🚀)
- Low budget: DIY conversion, recycled materials, basic equipment
- Medium budget: New materials, quality equipment
- High budget: Professional transformation, high-end equipment
📏 Tip: Draw a scale plan to visualize the space and avoid surprises before starting!
🛠️ Step 2: Vehicle Preparation – The Foundation of a Successful Conversion

Before starting the conversion of your converted van, van or motorhome, it is essential to carry out a thorough preparation. A well-prepared vehicle guarantees a durable, safe conversion without unpleasant surprises along the way.
This step involves checking the general condition of the vehicle, deep cleaning it, and removing any unnecessary elements to create a healthy base before installing your insulation, electricity, and furniture.
🔧 Essential checks before converting your van
Before starting the work, it is crucial to perform a complete vehicle diagnosis to avoid breakdowns and ensure optimal safety on the road. Here are the points to check:
1️⃣ Technical inspection and mechanical condition ⚙️
A vehicle in poor condition can quickly become a nightmare during your trips. Before converting it, perform a complete mechanical check-up:
✅ Engine and timing belt: Check wear and replace if necessary.
✅ Brakes 🛑: Ensure discs and pads are in good condition.
✅ Battery 🔋: A faulty battery can cause unexpected breakdowns.
✅ Tires 🚗: Check pressure and wear, replace if needed.
✅ Suspensions and shock absorbers 🏎️: Important for stability, especially with the extra weight of the conversion.
✅ Exhaust and filters 🔄: Replace air, fuel, and oil filters for better longevity.
📌 Tip: Call a professional mechanic if you have doubts before starting the conversion.
2️⃣ Rust treatment – Stop corrosion before it worsens 🛑
Used vans, small trucks, and motorhomes may have rust spots, especially around the wheel arches, floor, and doors. If rust is not treated before conversion, it can weaken the structure and cause water leaks.
🔍 How to treat rust effectively?
✔ Sanding: Rub affected areas with sandpaper or a wire brush.
✔ Rust converter treatment: Apply a rust converter product to stop corrosion.
✔ Protective paint 🎨: Cover with special anti-corrosion paint for lasting protection.
📌 Tip: Check under the chassis and apply a stone chip protection coating to protect your converted van from road debris.
3️⃣ Complete cleaning – A clean van for a healthy conversion 🧼
Before insulating and installing your coverings, a thorough cleaning is necessary!
🧽 Steps for deep cleaning:
✅ Vacuuming: Remove dust, debris, and residues from old coverings.
✅ Degreasing: Use a strong product to remove grease and old adhesives.
✅ Disinfection: Use antibacterial wipes or disinfectant spray to sanitize the space.
✅ Check for water leaks: Look for possible leaks (roof, windows, seals).
📌 Tip: Apply anti-moisture paint on the walls to prevent mold problems in the future.
4️⃣ Removal of unnecessary elements – Make way for your new conversion
Most vans and small trucks are equipped with partitions, rear seats, plastic trims, or old coverings that must be removed before starting the conversion.
👷♂️ To remove:
✔ Rear seats (if not needed).
✔ Wall and floor coverings (often worn or incompatible with insulation).
✔ Old fixings and supports that hinder the conversion.
📌 Tip: Keep some parts (handles, fixings) that can be reused in the conversion.
🔥 Mistakes to avoid during van preparation
❌ Not checking the mechanics before conversion – A breakdown after conversion can be costly and complicated.
❌ Ignoring rust – Untreated rust can weaken the structure and damage insulation.
❌ Neglecting cleaning – A clean surface ensures better adhesion for insulation and coverings.
❌ Not testing waterproofing – Check for leaks to avoid moisture and mold.
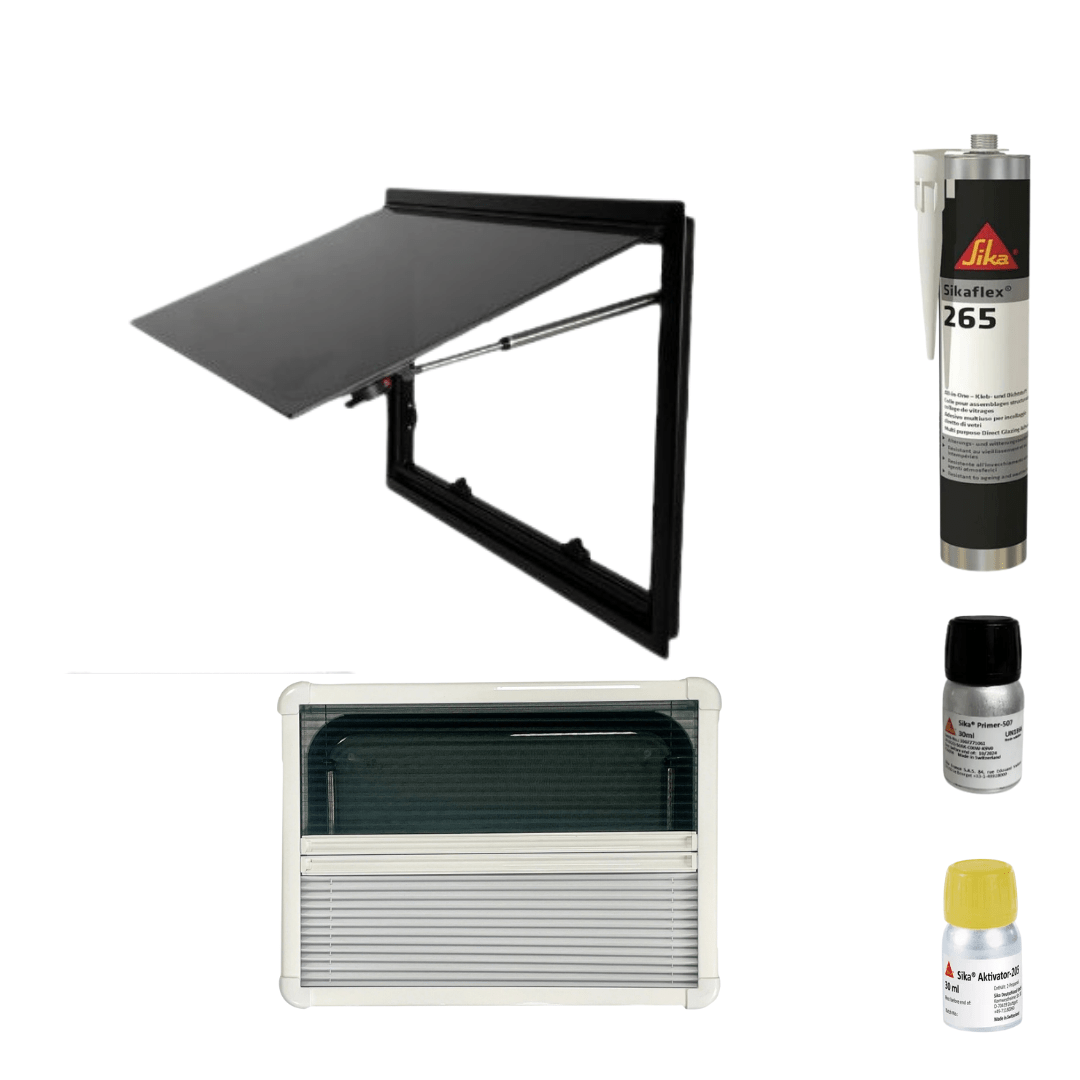
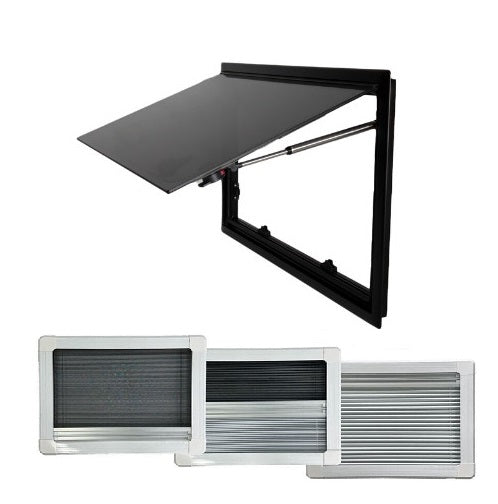
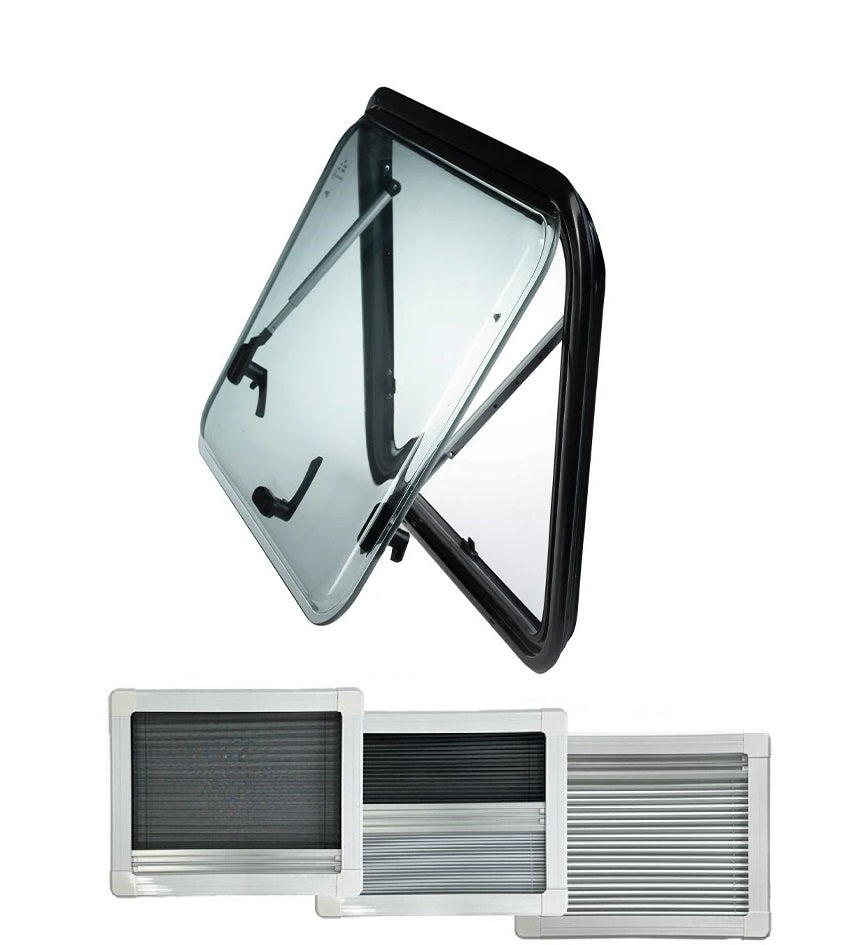
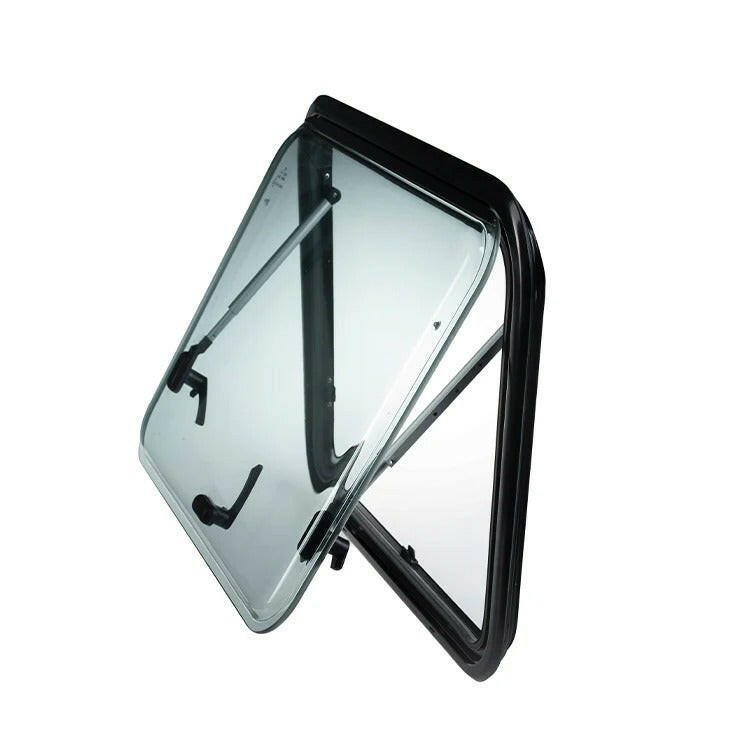
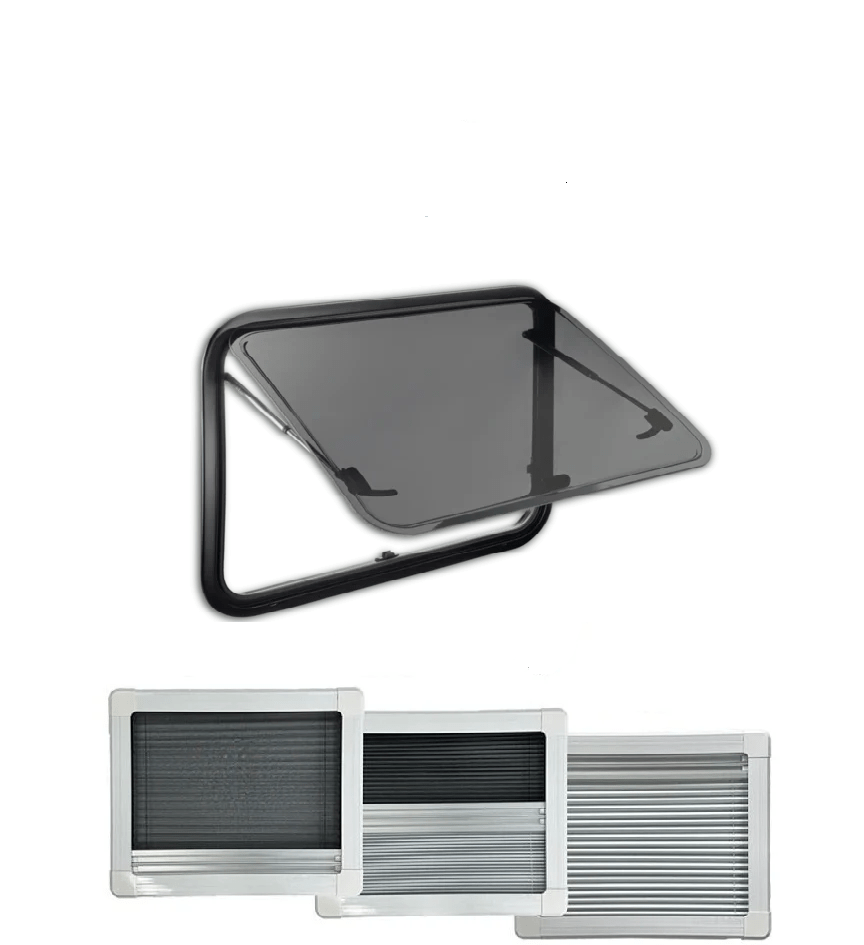
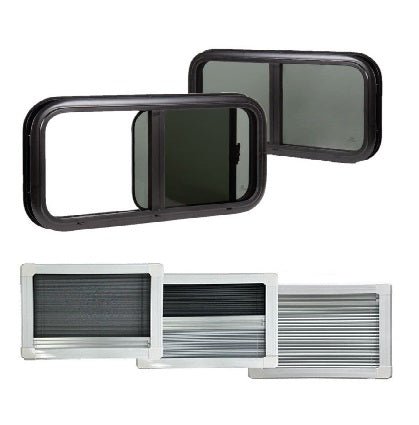
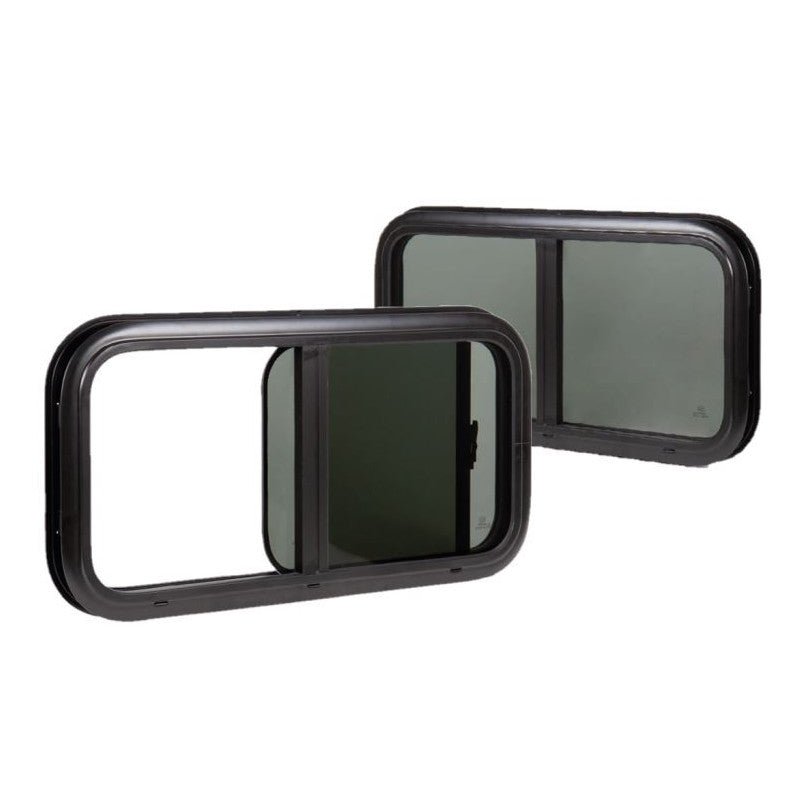
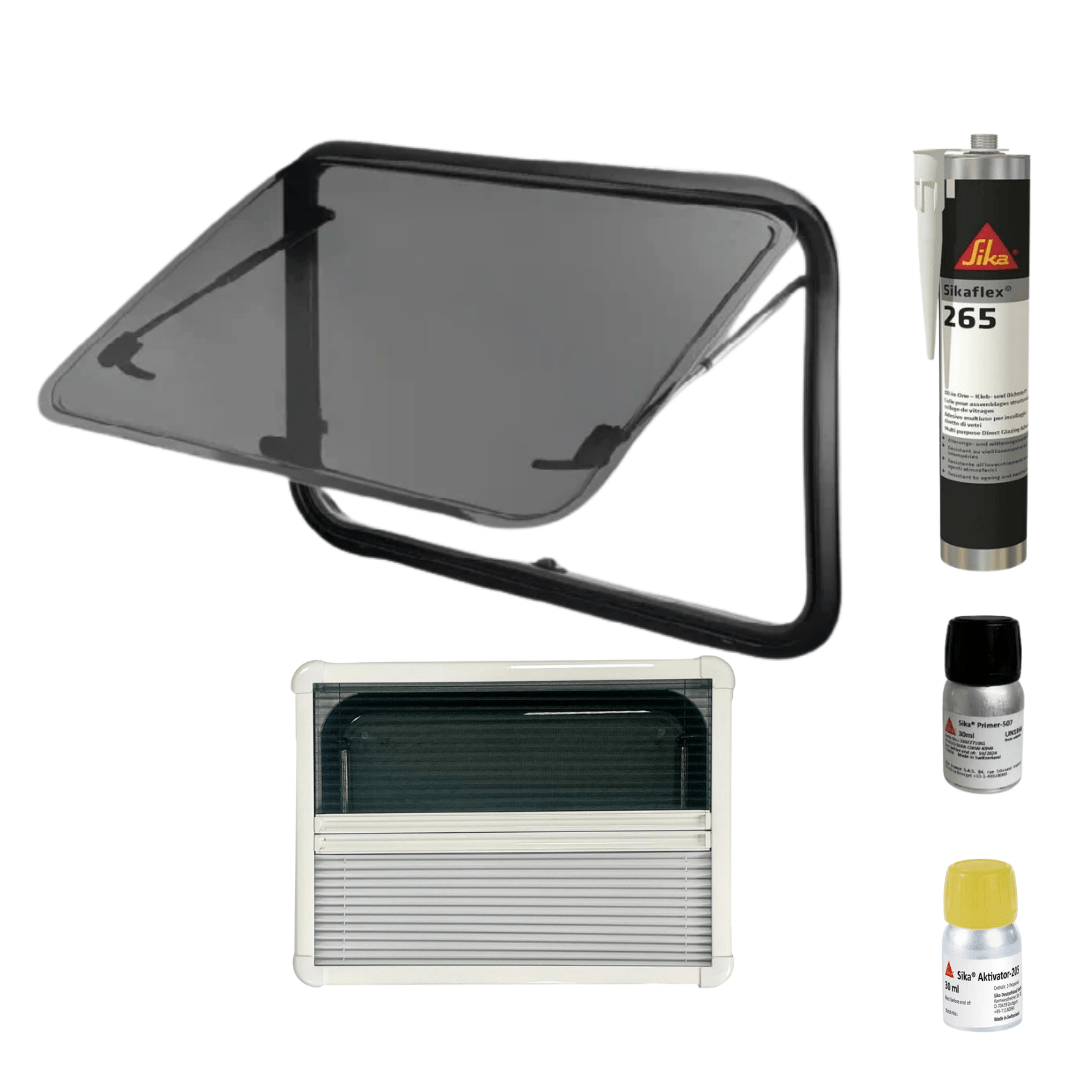
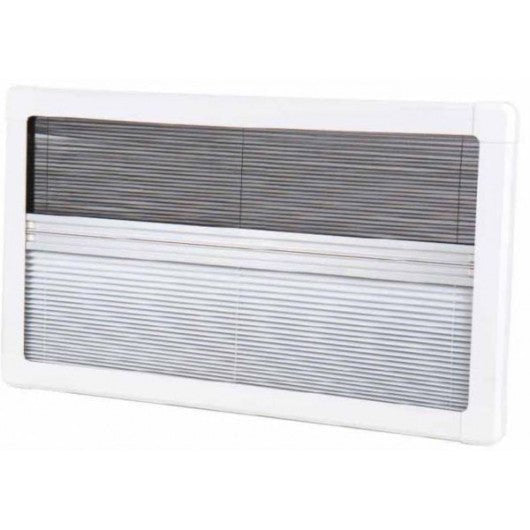
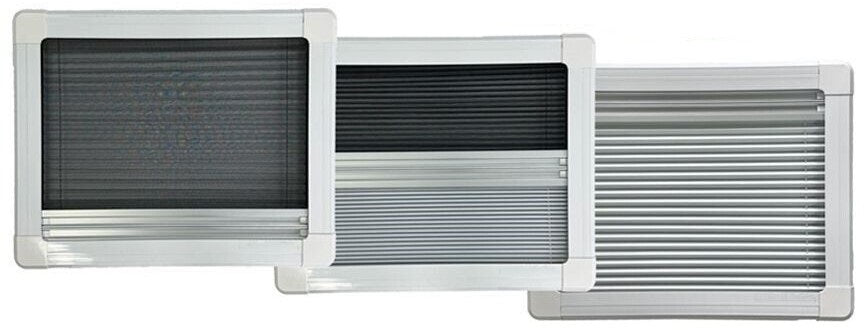
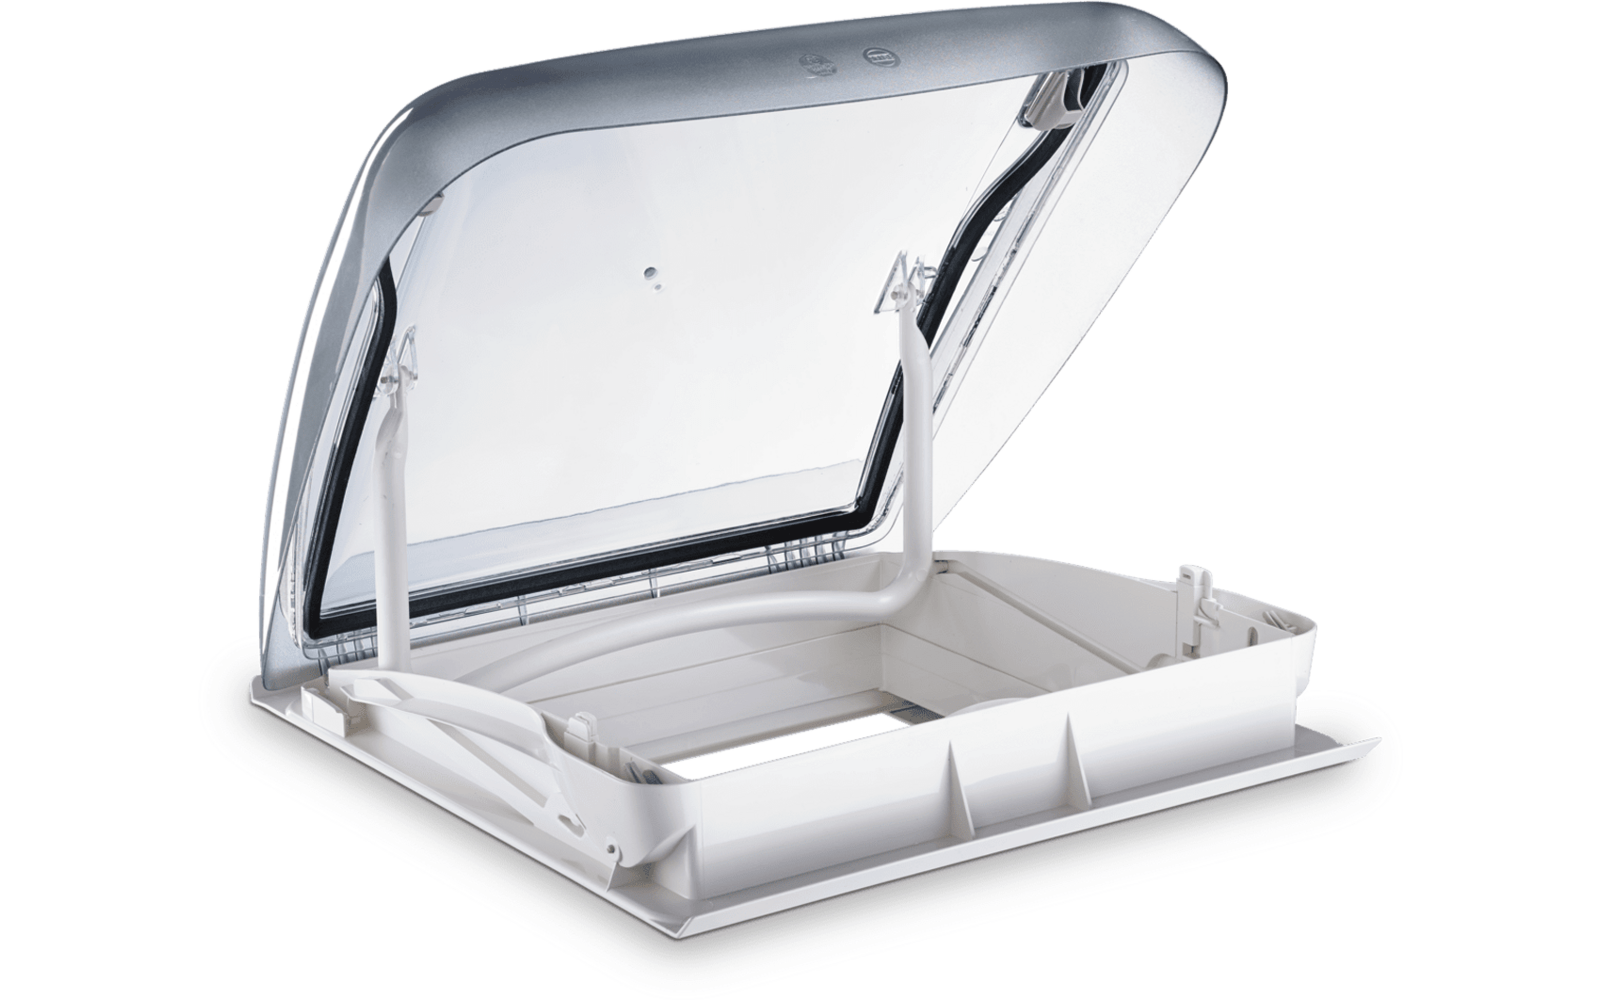
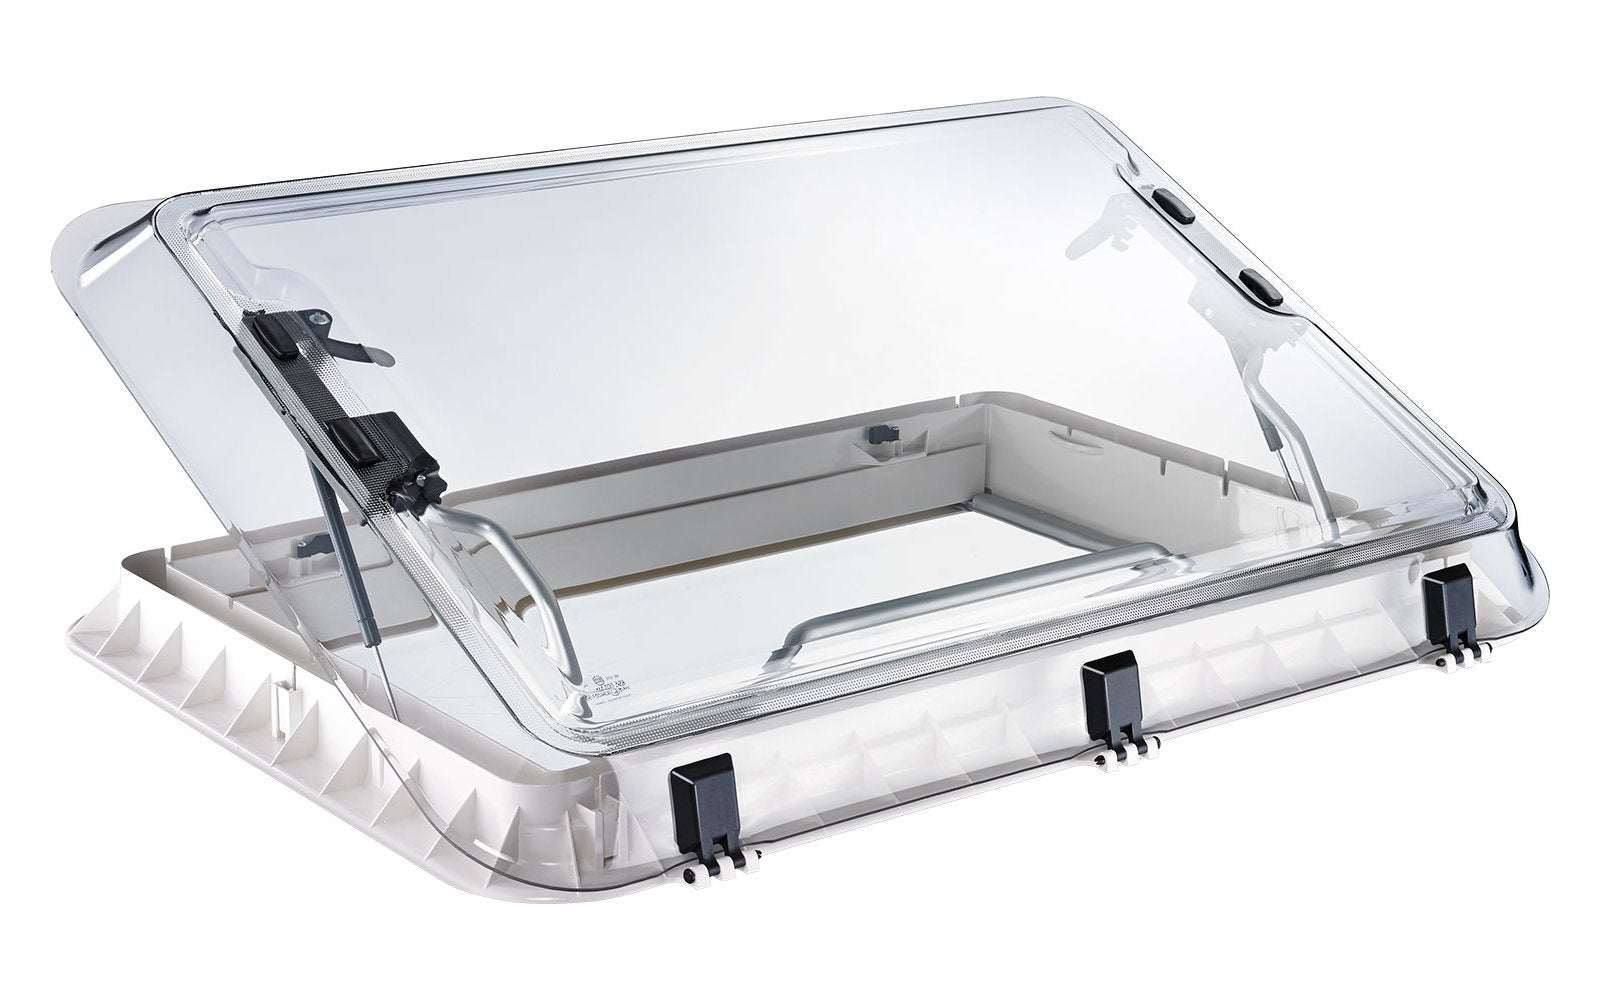
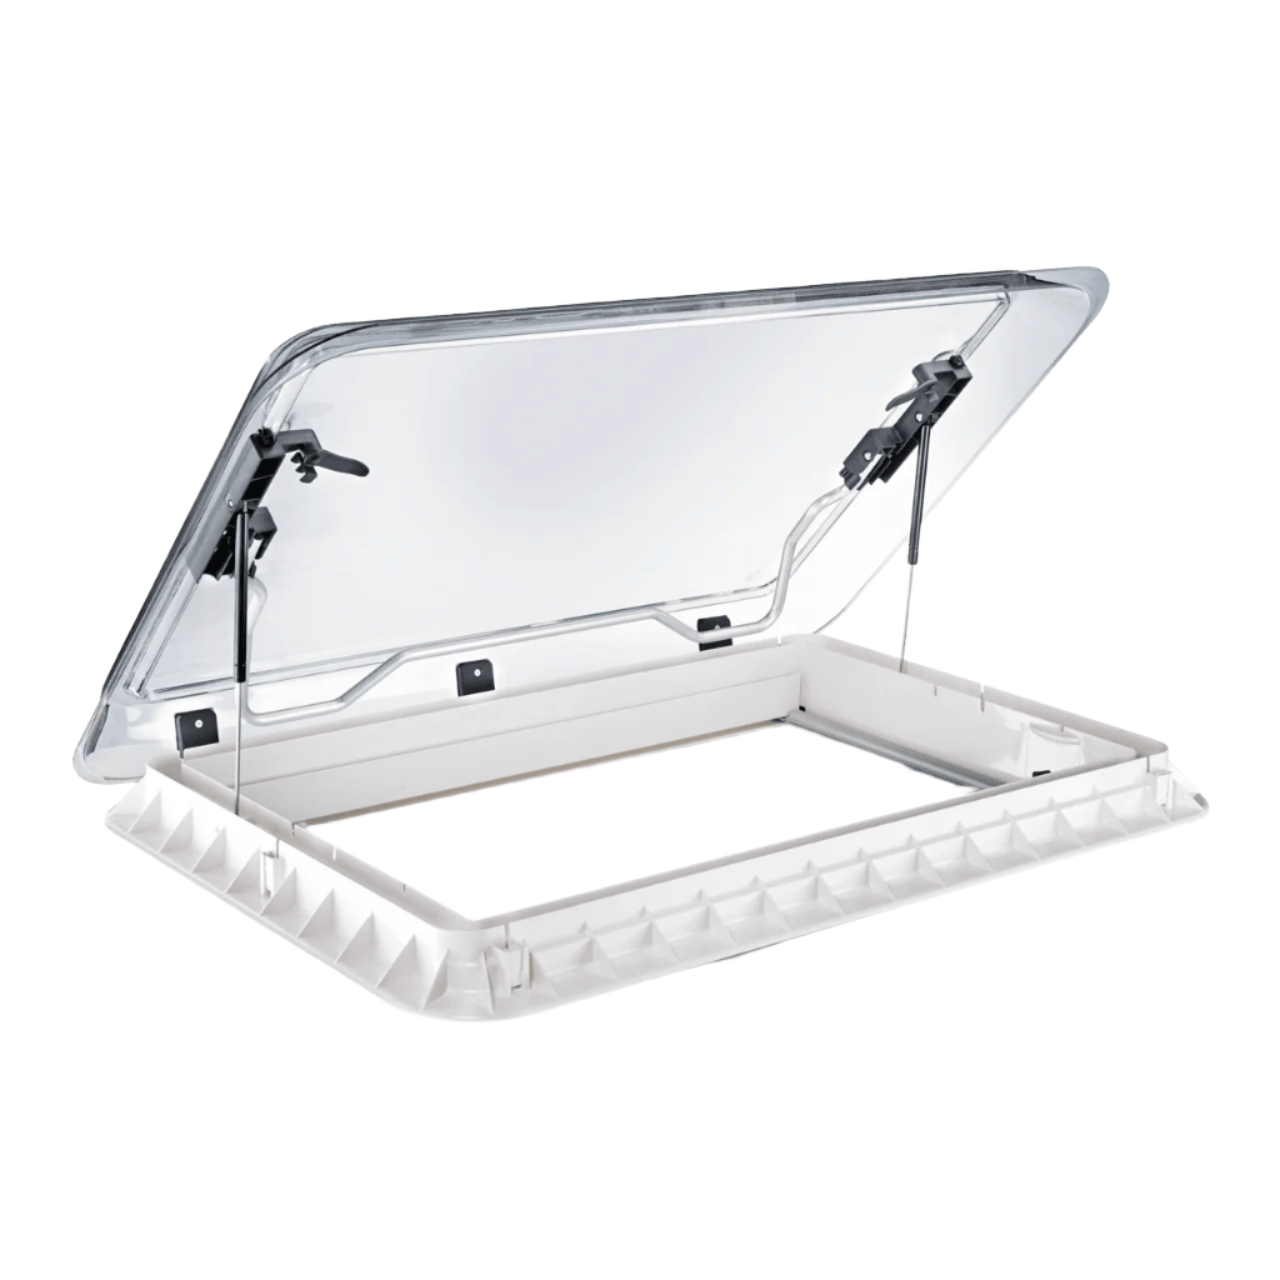
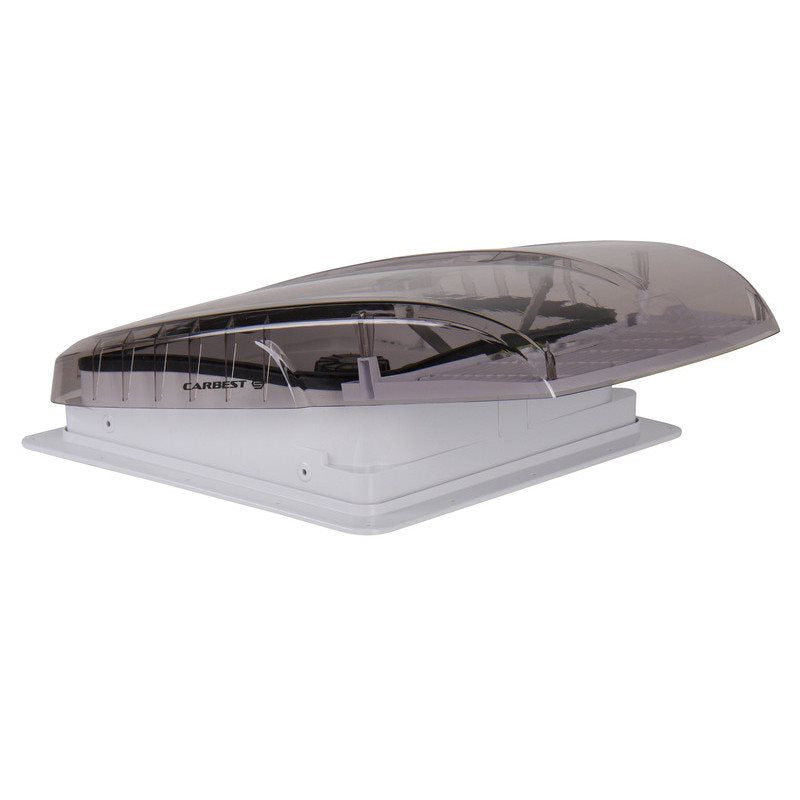
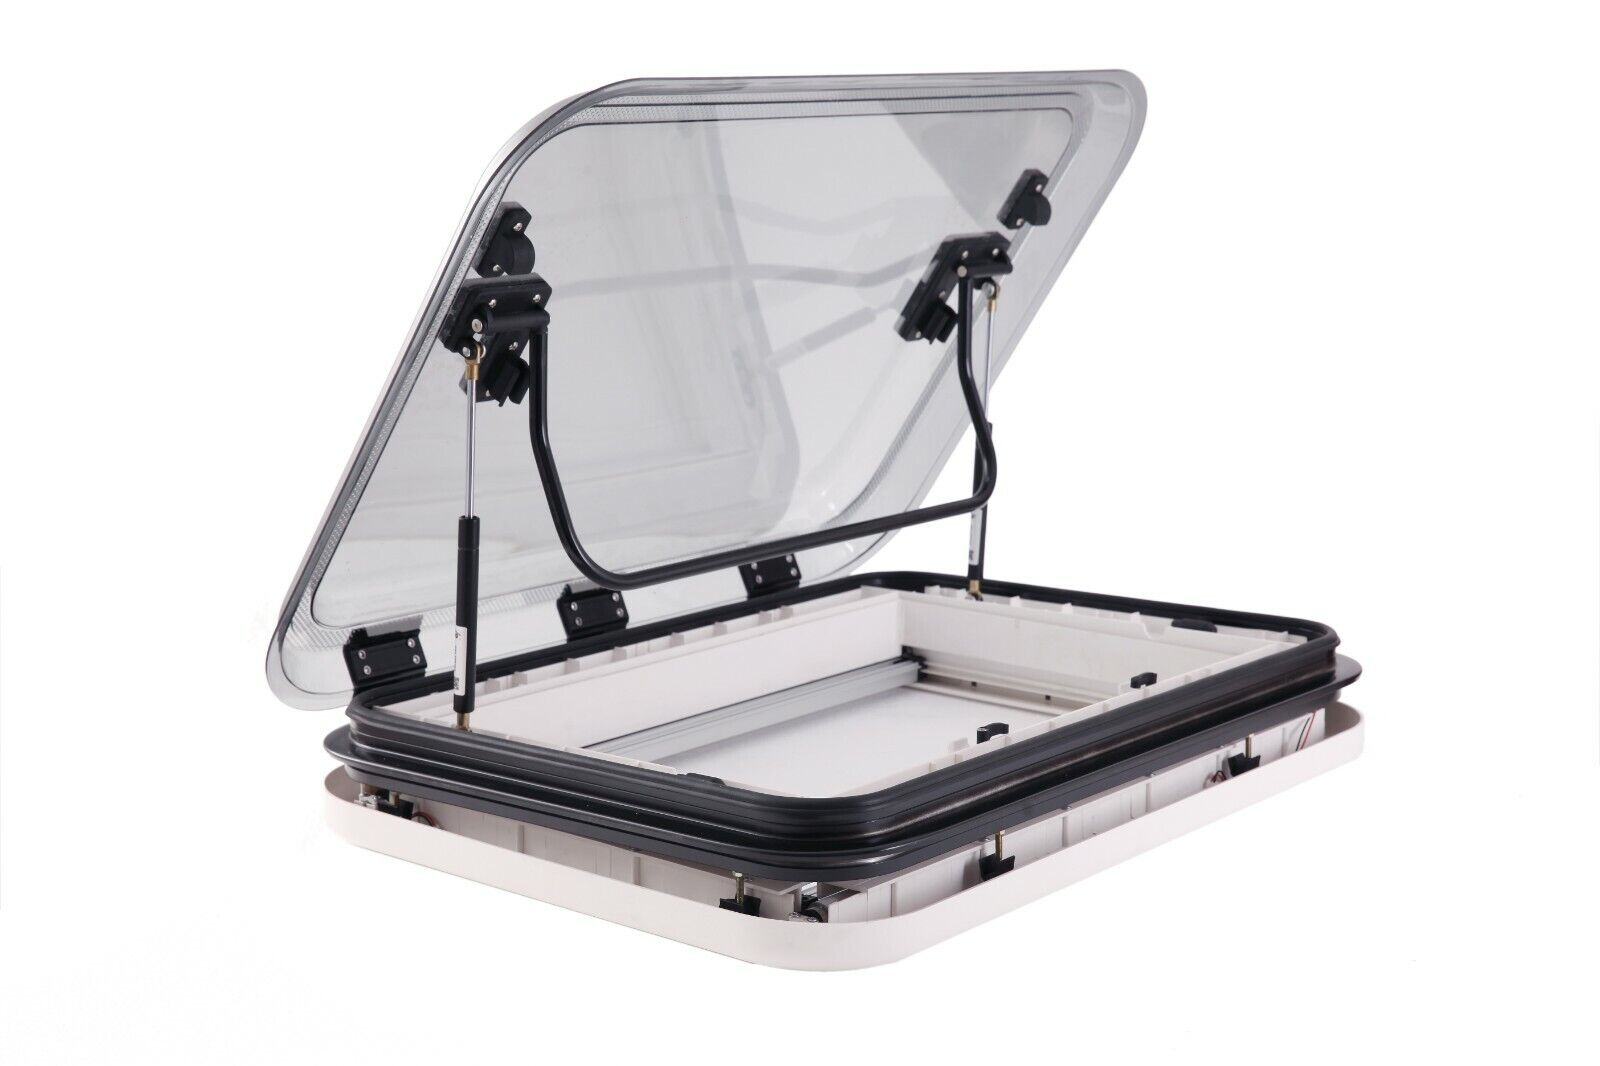
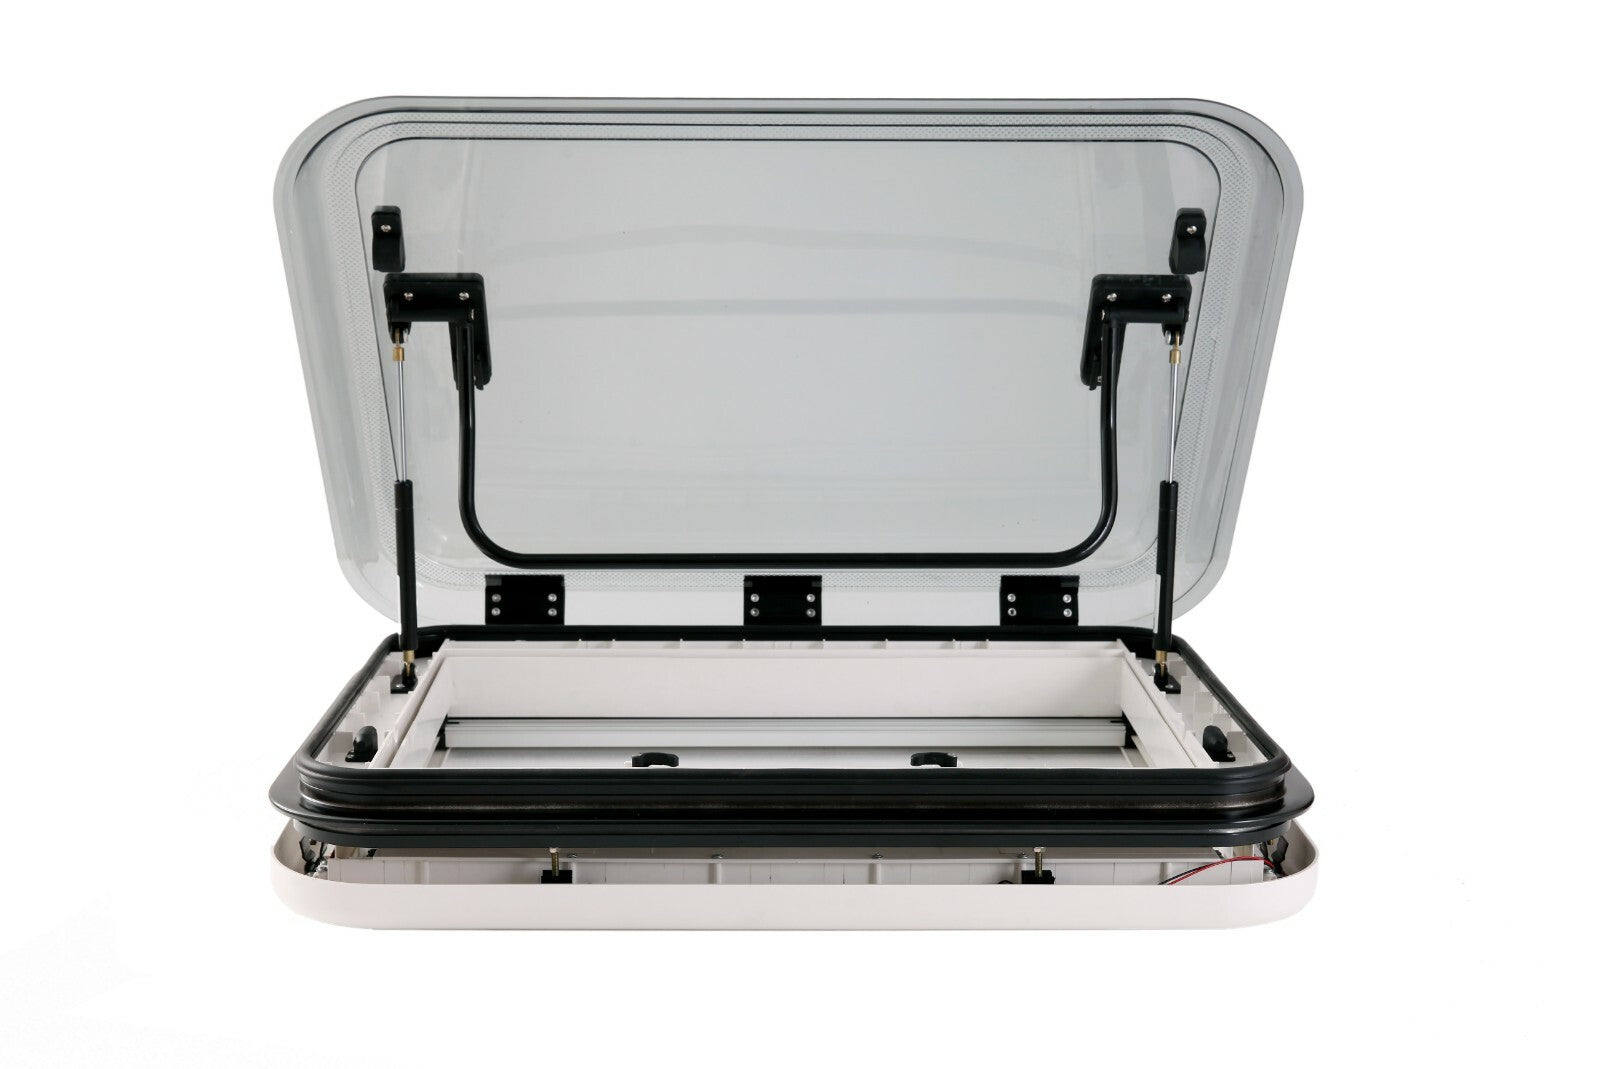
🛠️ Step 3: Creating Openings: Windows and Roof Vent for a Converted Van

Installing Windows sliding windows, fixed windows, and a roof vent is essential to ensure ventilation, brightness, and thermal comfort in your van or motorhome. Here are detailed steps for a well-insulated and watertight installation:
1️⃣ Choosing windows and roof vent
- Choose Windows glazed sliding windows or projecting windows, specially designed for vans and motorhomes.
- Select a roof vent with permanent ventilation to avoid condensation and improve air circulation.
- Ensure openings are suitable for the thickness of your van's walls.
2️⃣ Defining and marking locations
- Identify optimal areas for windows: ideally on the van's sides, avoiding structural pillars.
- Place the roof vent on the roof, considering reinforcements and interior layout.
- Trace the outlines of the openings using a template or precise marker.
3️⃣ Cutting the bodywork
- Drill holes at the corners to facilitate cutting.
- Use a jigsaw with a fine blade to cut the sheet metal cleanly.
- File and apply rust protection on cut edges to prevent corrosion.
4️⃣ Installation and sealing of openings
- Apply a sealant (butyl mastic or SikaFlex) around the openings.
- Install the window or roof vent pressing firmly against the bodywork.
- Screw or fix securely depending on the type of opening.
- Check that the insulation around the openings is properly in place to limit thermal bridges.
5️⃣ Verification and finishing touches
- Test waterproofing with a water jet and check for leaks.
- Install curtains, blinds, or thermal shades for better comfort.
- Ensure good ventilation by combining roof vent and windows for effective airflow.
With these steps, your converted van will benefit from optimal ventilation, a bright interior, and perfect insulation for a peaceful journey! 🚐✨
🔥 Step 4: Insulation and Coverings – Optimal Comfort in All Seasons

Insulation is a crucial step in the conversion of a van, as it guarantees your thermal and acoustic comfort throughout the year. Without good insulation, your van or small truck risks becoming a real oven in summer 🌞 and a freezer in winter ❄️.
Moreover, insulation plays an essential role in reducing condensation, which can cause mold and damage your equipment. A good choice of materials and careful installation will improve the durability of your motorhome and reduce your energy consumption.
🏗️ Different types of insulation for vans
There are several types of insulating materials suitable for van conversion, each with its advantages and disadvantages. Here is a selection of the most popular options:
🔹 Rock wool or animal origin – The ecological and efficient option
✅ Advantages:
- Natural, breathable, and moisture regulating
- Excellent thermal and sound insulation
- Fire and mold resistant
❌ Disadvantages:
- Higher price
- May emit a slight odor at first
💡 Ideal for: Those looking for natural and durable insulation for their van or small truck.
🔹 Sprayed or panel cork 🍂 – The ultimate moisture barrier
✅ Advantages:
- Lightweight and easy to apply
- Very good thermal and sound insulation
- Excellent moisture resistance
❌ Disadvantages:
- Higher cost than other insulators
- May require several layers for good efficiency
💡 Ideal for: Travelers who want a lightweight and effective solution against moisture.
🔹 Expanded polyurethane foam 🔶 – Easy to install and effective
✅ Advantages:
- Very good insulating power
- Easy to apply (spray or panel)
- Excellent air and water tightness
❌ Disadvantages:
- Less ecological
- May emit volatile compounds during application
💡 Ideal for: Those looking for high-performance insulation that is quick to install.
🔹 Extruded polystyrene (XPS) 📏 – The best value for money
✅ Advantages:
- Good thermal insulation
- Lightweight and easy to cut
- Affordable price
❌ Disadvantages:
- Average sound insulation
- Sensitive to moisture without vapor barrier
💡 Ideal for: A low-cost conversion with good thermal performance.
🔹 ArmaFlex 🏗️ – High-performance insulation for converted vans
✅ Advantages:
- Excellent thermal and sound insulation
- Resistant to moisture and mold
- Easy to install thanks to its self-adhesive version
❌ Disadvantages:
- Higher price than XPS
- Can be difficult to reposition once glued
💡 Ideal for: A well-insulated van, without thermal bridges, perfect for all seasons. 🚐🔥❄️
🏡 Interior coverings: Combining aesthetics and durability
Once insulation is in place, it is important to cover the walls with suitable materials to ensure a clean and durable finish. Here are some popular options:
🔹 Plywood (best choice): Durable and easy to work with, ideal for walls and furniture.
🔹 Wood paneling (for ceiling and/or side walls): Adds a warm and natural touch.
🔹 Vinyl or linoleum: Ideal for floors as it is easy to clean and moisture resistant.
🔹 Fabrics and felt: Improves acoustics and adds visual comfort.
📌 Tip: Securely fix your coverings to prevent them from detaching while driving!
🔥 Areas not to neglect for optimal insulation
💡 Wall and door insulation: Essential to keep heat in winter and coolness in summer.
💡 Floor insulation: Helps limit heat loss and improves comfort underfoot.
💡 Ceiling insulation: A large part of heat escapes through the top, don't neglect it!
💡 Window and door insulation: Use thermal curtains, reflective films, or removable insulating panels.
🛠️ How to properly install insulation?
1️⃣ Prepare the surface: Clean and treat rust-prone areas.
2️⃣ Cut insulating materials: Adjust to the dimensions of walls and floor.
3️⃣ Fix the insulation: Glue or screw panels depending on the material type.
4️⃣ Add a vapor barrier if necessary to prevent condensation.
5️⃣ Install interior coverings for a clean and aesthetic finish.
⚡ Step 5: Electrical Installation – Energy Independence for Traveling Freely

A reliable and properly sized electrical system is essential to ensure your van autonomy. Whether to power your van equipment such as lighting, a refrigerator, USB outlets, a water pump, or a laptop, a good electrical installation will allow you to fully enjoy your trip without constraints.
Without an appropriate energy source, you risk running out of electricity at the worst moment... and desperately looking for a charging station! 😅
Let's see together how to set up an effective electrical system for your motorhome, van, or converted small truck. 🚐🔋
🔋 Basics of a van's electrical system
Electricity in a converted van relies on several essential components that allow storing, transforming, and distributing energy:
🔹 1. Auxiliary battery – The heart of the system
An auxiliary battery powers your van equipment without draining your vehicle's engine battery. It stores energy from the vehicle while driving, solar panels, or a mains socket when parked at a campsite.
📌 Two types of batteries are recommended:
✅ AGM (Absorbent Glass Mat) 🔌 :
- Cheaper than lithium
- Maintenance-free and vibration resistant
- Can be charged by the vehicle's alternator
✅ Lithium (LiFePO4) ⚡ :
- Lighter and more compact
- 3 to 4 times longer lifespan
- Faster charging and more stable capacity
💡 Our advice: If you have a low budget, go for an AGM battery. If you want maximum autonomy and durability, choose a lithium battery.
🔹 2. Solar panels – For maximum autonomy in camping ☀️
Adding solar panels allows you to produce your own electricity, ideal for traveling independently without relying on campsite sockets.
📏 What power to choose?
🔹 100W: For very basic use (lighting, smartphone, small fridge)
🔹 200-300W: For standard use (fridge, laptop charger, water pump)
🔹 400W and more: For a converted van in full-time nomadic mode
💡 Tip: Install an MPPT regulator to optimize the yield of your solar panels and avoid battery overcharge.
🔹 3. Solutions to recharge your battery 🚗⚡
Besides solar panels, there are several ways to recharge the auxiliary battery:
✔ DC/DC charger: Charges the auxiliary battery using the vehicle's alternator while driving.
✔ 220V charger: Allows charging the battery at a campsite or at home.
📌 Note: With a DC/DC charger, your battery can recharge quickly while driving, convenient if you move often!
🔹 4. 12V/220V converter – Use standard appliances in the van ⚡
A 12V/220V converter transforms the 12V current from the auxiliary battery into 220V, allowing you to power devices like a laptop, blender, or electric coffee maker.
💡 Which converter to choose?
🔹 300W: To charge light devices (PC, phone)
🔹 1000W and more: For more powerful devices (microwave, hairdryer)
📌 Tip: If possible, favor 12V devices to avoid energy loss during conversion.
🔹 5. LED lighting – Low consumption for a cozy atmosphere 💡
LED lighting is ideal for a converted van because it offers low energy consumption, good brightness, and a long lifespan.
💡 Some ideas for optimal lighting:
✔ Recessed LED spots in the ceiling 🌟
✔ LED strips under furniture for a cozy atmosphere ✨
✔ Rechargeable lamp for outdoors 🌙
📌 Tip: Install a dimmer to adjust lighting according to the desired ambiance and save even more energy.
📊 Calculate your electrical consumption: An essential step before buying equipment
📌 Before choosing your battery and solar panels, it is essential to calculate your daily energy consumption.
Example of consumption:
🔹 LED lighting: 5W x 4 hours = 20Wh
🔹 12V refrigerator: 50W x 24h (about 40% running time) = 480Wh
🔹 Laptop charging: 60W x 3h = 180Wh
🔹 Water pump: 30W x 1h = 30Wh
Total daily: 710Wh, about 60Ah at 12V.
💡 If you have a 100Ah AGM battery, you can only use 50Ah (because it should not be discharged more than 50%). You will need to recharge it regularly.
✅ Mistakes to avoid during van electrical installation
❌ Underestimating energy needs – Make an accurate calculation before buying your battery.
❌ Not protecting circuits – Install appropriate fuses to avoid short circuits.
❌ Neglecting cable gauge – A cable that is too thin can heat up and become dangerous.
💡 Remember to add a main circuit breaker to secure your installation!
🚿 Step 6: Water and Plumbing – Essential Comfort in a Converted Van
Having a well-thought-out water system in your converted van is a real asset to gain comfort during your trips. Whether you want a equipped kitchen, an indoor or outdoor shower, or toilets, a good installation will allow you to be autonomous in all circumstances.
Good water management is essential, especially if you practice wild camping or nomadic living. Here is everything you need to know for an effective installation adapted to your van, small truck, or motorhome.
💧 Basics of a water system in a van
Water in a converted van relies on three key elements:
🔹 A clean water tank 💦
🔹 A grey water tank 🚰
🔹 A water pump to deliver water to the sink and/or shower 🚿
Depending on your budget and available space, you can choose a simple manual system or an electric system with pump and water heater for more comfort.
🛠️ Necessary equipment for water and plumbing in a van
🔹 1. Clean water tank – Your source of drinking water 🚰
A clean water tank is essential to store drinking water. It can be fixed under the floor or removable for easier filling.
📏 What capacity to choose?
✔ 20-30L: Enough for short trips of a few days.
✔ 50-80L: Ideal for daily use with shower and kitchen.
✔ 100L and more: For a motorhome or a converted van in long-term nomadic mode.
📌 Tip: Add a water filter to improve drinking water quality and avoid impurities!
🔹 2. Grey water tank – To evacuate used water
Water used for dishes or shower must be stored in a grey water tank before being emptied in a designated area.
💡 Possible options:
✔ Tank under the sink (removable, easy to empty)
✔ Tank under the chassis (fixed and larger capacity)
📌 Tip: Add a odor trap on the drain to avoid unpleasant smells.
🔹 3. Water pump – To deliver water to the tap 💦
To circulate water in your van, there are two types of pumps:
✅ Manual pump – Works without electricity, economical and easy to install.
✅ 12V electric pump – More practical, provides constant pressure like at home.
📌 Tip: Add a pressure switch so the pump activates automatically when the tap is opened.
🔹 4. Equipped kitchen – To cook like at home 👩🍳
A well-thought-out kitchen allows you to better manage water and fully enjoy your van trip.
✔ Compact stainless steel sink with a folding faucet to save space.
✔ Water reserve under the sink for easy filling.
✔ Grey water container to empty regularly.
📌 Tip: Use a basin in the sink to save water and facilitate cleaning.
🔹 5. Shower – Indoor or outdoor? 🚿
Taking a hot shower after a long day of travel... a real luxury in a converted van! 🚐✨
💡 Possible options:
✅ Outdoor shower – Simple and economical, ideal in summer.
✅ Indoor shower – More comfortable but requires more conversion work.
✅ Solar shower – Black bag heated by the sun for a natural hot shower.
✅ Gas or electric water heater – For a hot shower anytime!
📌 Tip: Install an outdoor shower curtain for more privacy if you choose an outdoor shower.
🔹 6. Toilets – For more autonomy in wild camping 🚽
If you like wild camping, having toilets in your converted van is a real plus!
💡 Types of toilets suitable for converted vans:
✔ Chemical toilets – Easy to use but require specific products.
✔ Dry toilets – Ecological, waterless, odorless, and chemical-free.
✔ Folding toilets – Practical for occasional use.
📌 Tip: Dry toilets with sawdust are an excellent alternative for a nomadic and environmentally friendly lifestyle.
🌧️ Bonus: Install a rainwater harvesting system
To gain autonomy, you can collect rainwater using a simple system:
💧 Install a tarp or funnel connected to a filter and a clean water tank.
📌 Tip: Filter the water well before use to avoid impurities and bacteria.
✅ Mistakes to avoid during water installation in a van
❌ Not insulating pipes – Water can freeze in winter, consider thermal insulation.
❌ Underestimating consumption – Plan a sufficient tank to avoid surprises.
❌ Not securing elements properly – A leak can happen quickly while driving!
❌ Forgetting a water filter – It ensures cleaner and better-tasting drinking water.
📌 Tip: Test your installation before leaving on your trip to avoid any unpleasant surprises.
🚽 Discover our dry toilets on sale here!
🏡 Step 7: Interior Layout – Optimize Every cm²
🛏️ Sleeping area: Fixed bed, convertible bench, or pull-out bed?
🍽️ Kitchen: Worktop, hanging storage, sliding drawers.
📦 Storage: Maximize space under the bed, wall shelves.
🛋️ Lounge area: Benches with comfortable cushions and folding table.
📌 Advice: Use lightweight and durable materials to avoid overloading the van!
🎨 Step 8: Personalization and Decoration – A Van in Your Image
Add personal touches for a unique and warm van:
🌿 Hanging plants
🕯️ LED garlands for a cozy atmosphere
🧶 Colorful curtains and cushions
📸 Travel photos and souvenirs
📌 Tip: Secure objects firmly to prevent them from moving during the trip!
✅ Step 9: Pre-Departure Checks – Safety and Comfort
🔍 Test all equipment (electricity, water, gas).
🚗 Do a road test to check the stability of installations.
🗺️ Prepare your itinerary and check out camping spots!
🚐 Conclusion: Converting a van, an exciting and accessible project!
By following these steps, you can transform your van into a truly custom motorhome, even at a low cost. Whether for a nomadic adventure or simple trips, converting a van offers you unlimited freedom.
✨ To finish beautifully ✨, don't miss our bestsellers and promotions to convert your van without breaking the bank! 🚐💰 Enjoy the best offers on insulation, ventilation, furniture, and much more.
🔥 Mistakes to avoid during van preparation
❌ Not checking the mechanics before conversion
❌ Ignoring rust
❌ Neglecting cleaning
❌ Not testing waterproofing
Areas not to neglect for optimal insulation
💡 Wall and door insulation: Essential to keep heat in winter and coolness in summer.
💡 Floor insulation: Helps limit heat loss and improves comfort underfoot.
💡 Ceiling insulation: A large part of heat escapes through the top, don't neglect it!
💡 Window and door insulation: Use thermal curtains, reflective films, or removable insulating panels.
🛠️ How to properly install insulation?
1️⃣ Prepare the surface: Clean and treat rust-prone areas.
2️⃣ Cut insulating materials: Adjust to the dimensions of walls and floor.
3️⃣ Fix the insulation: Glue or screw panels depending on the material type.
4️⃣ Add a vapor barrier if necessary to prevent condensation.
5️⃣ Install interior coverings for a clean and aesthetic finish.