

How to install a roof fan and solar panels on your Campervan: Complete guide
Introduction: Transform your Sprinter van into a Campervan by installing a roof fan and solar panels.
In this guide, we explain step by step what you need to succeed in this essential project for the layout of your van.
Note that this mounting method is universal. You can find here our fans in stock and here all our sealants and promotional items.
Our Vanlife layout experts are here for you! Whether you have a question about our products or are looking for advice to transform your van into a true nomadic cocoon, contact us – we will be happy to guide you!
Necessary materials
- 40 x 40 fan for Campervans
- 200W solar panels
- Aluminum roof rails
- Bolts, nuts, and rivets
- Tools: drill, jigsaw, screwdriver, etc.
Installation steps
Fan choice
We chose to use the 40x40 model with 3 speeds, which is mid-range. A popular choice is the Carbest Vanvent, which is high-end with interesting features including hot air extraction and rain detection.
The 40x40 fan has three speeds, a reversible direction allowing it to either draw in or expel air, and an integrated thermostat for automatic activation based on the set temperature. It offers all the basic features needed at a price about one third lower than high-end models, perfect for our installation.
Marking and cutting
The fan comes with foam protection that we can use to position the cutout on the roof and mark the cutting lines.
Some first-generation Sprinter vans had a section on the roof, adjacent to the sliding door, where an original fan or passenger air conditioning unit is mounted. This can be a perfect spot to mount the fan without interfering with ribs or other structural elements.
Additionally, we will install sliding windows towards the rear of the van, so placing the fan here allows enough distance to get good airflow when the windows are open at the back.
After marking with a marker, we removed the template and applied painter’s tape along the perimeter to prevent scratches caused by the jigsaw shoe when cutting the hole.
Cutting the sheet metal
Using a step drill bit, we drilled a ½" hole near each corner so the jigsaw could pivot from side to side. We used a fine-toothed metal blade to cut the square with a jigsaw. Cutting sheet metal with a jigsaw is very noisy, so be sure to wear hearing protection.
PRO TIP: To minimize cleaning inside the van, we taped a large garbage bag under our cut line to catch metal shavings.
Before removing the painter’s protective tape, we sprayed semi-gloss white anti-rust paint to seal the bare metal edges. Once the paint was dry, we removed the tape and cleaned the perimeter with a simple cloth.
Frame construction
We then cut 2x4cm wooden boards and drilled holes to create a frame for the fan. This frame will be mounted under the fan from the inside, essentially sandwiching the roof panel between the two. It provides extra material for the fan mounting screws to hold onto as well as support for the finishing trim once the ceiling panels are installed.
Sealing and Installing the fan
We used Sika 521UV adhesive sealant. Another popular sealant choice is Sikaflex 522.
After applying the adhesive sealant, we positioned the fan, making sure to move it from side to side so the sealant could spread.
The hinged part is oriented towards the front of the vehicle. This is important because the fan is a perfect square and can fit in any direction. You want the opening to face away from the direction of travel (i.e., forward), because the opposite direction will cause a parachute effect and tear off the cover when driving on the highway if left open.
Fan mounting
While one person holds the wooden frame underneath, inside the van, another must apply some self-drilling metal-to-wood screws. We used standard length screws.
Final sealing
Once all the screws are in place, we taped the perimeter of the fan and generously applied exterior window sealant around the holes and empty spots. The goal here is to reduce any chance of leaks.
To finish the fan installation, we removed the cellophane and appreciated the result!
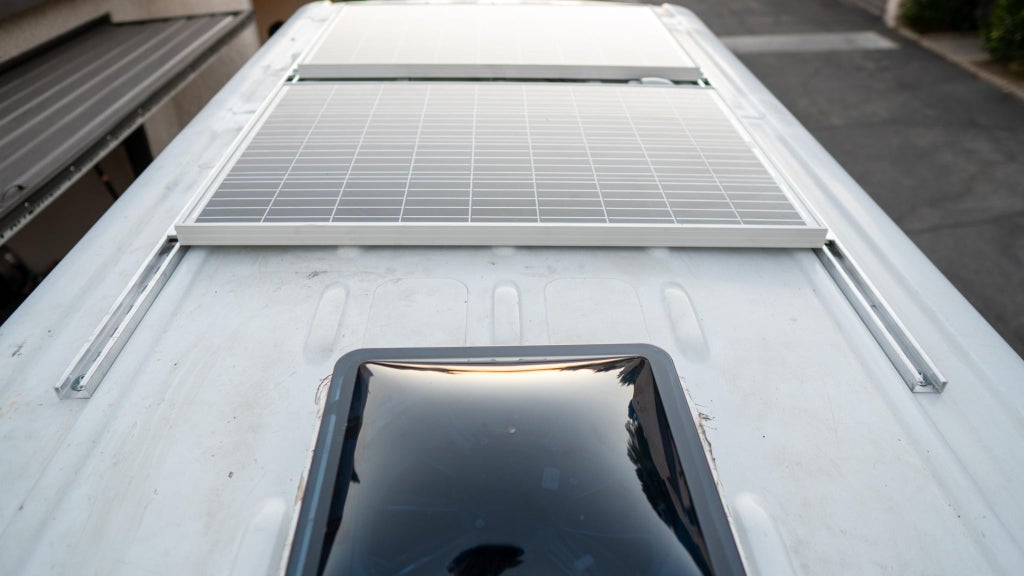
Roof rails and solar panel installation
Rather than using standard roof rails, we used low-profile aluminum profiles 150cm long. Unlike newer models, the 2005 Sprinter does not have original mounting points. So we used three M8 rivet nuts to fix each of the rails. Using a drill bit, we drilled a hole large enough for the threaded rivet to fit perfectly.
Threaded rivet installation
It is not necessary to buy a special tool for threaded rivets, you can use a bolt with a different thread than the rivet, some nuts larger than the bolt (we used M10 nuts), and some washers.
Once all the parts are threaded together, simply insert the assembly into the hole and tighten the bolt using the impact drill while holding it straight with the nuts using the wrench. By tightening little by little, you will start to feel the compression of the rivet.
Once the clamping resistance increases again, you can simply loosen the bolt and the rivet will stay in place. Be sure not to overtighten the bolt, as this could damage the rivnut knobs once compressed and it would be difficult to remove.
Solar panel mounting
Using 4cm aluminum bar profiles, we cut them to length to have four pieces of 2 feet long that we can attach to the short sides of the panels. We made oblong holes on the sides of the mounting on the rails by measuring two equidistant points, drilling holes slightly larger than an M8 bolt, cutting the material between the two holes with a jigsaw, and smoothing the edges. It is not absolutely necessary to make slots in the holes, but we thought it would give a bit more adjustment possibility during assembly.
Since the length of the angle aluminum is shorter than the width of the panels, we just roughly centered it and transferred the hole locations with a marker. Using the same drill bit as before, we used our hand drill to drill the holes we had marked on the solar panels.
We made sure the holes were aligned by placing the rivets through the aluminum angle and into the solar panels before fastening. Then we secured the rivets using the rivet tool.
If you have never used a riveting tool before, it takes a few pumps on the handle before there is enough tension to deform the mandrel tail, which is the piece that sticks out and goes into the tool.
We fixed the rest of the brackets with rivets and achieved a fairly solid mounting solution.
Cleaning rust before final solar installation

Before we could finish installing the roof rails and panels, we had to treat all the surface rust on the roof. There are seams where the body sections overlap and are spot welded together, which is a big water leak problem on some vans. Also, for our van, it seemed someone had gone under something with low clearance and scratched the paint in some spots. So we used a wire wheel to remove the surface rust and sprayed a coat of rust inhibitor.
We applied a bead of the same sealant used when mounting the fan, Bostik 70-03, on the seams and smoothed it with our finger. Since the sealant can be painted, a nice fresh coat of paint should give it a relatively OEM look.
Rail mounting
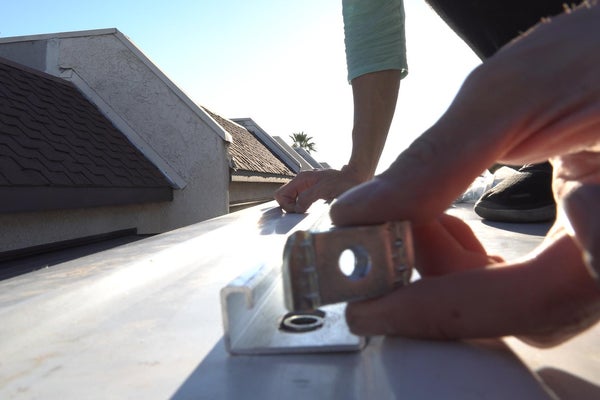

Once we positioned the rails on the locations of the rivet nuts, we slid the channel nuts that will be used to mount the solar panels before tightening the rail mounting bolts.
We used a large diameter mudguard washer for the mounting bolts to ensure we have enough surface area to provide good clamping force and blue Loctite on the threads to guarantee the bolt does not loosen due to vibrations on the road.
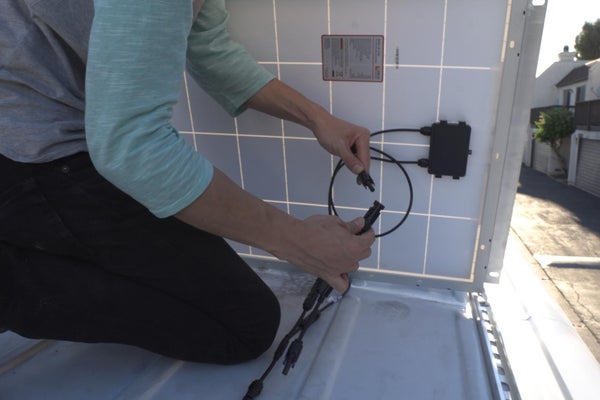
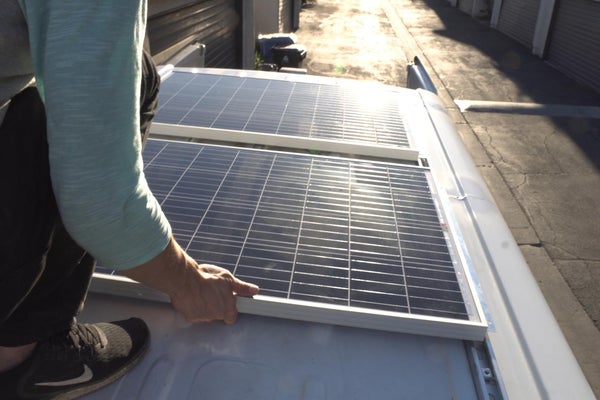
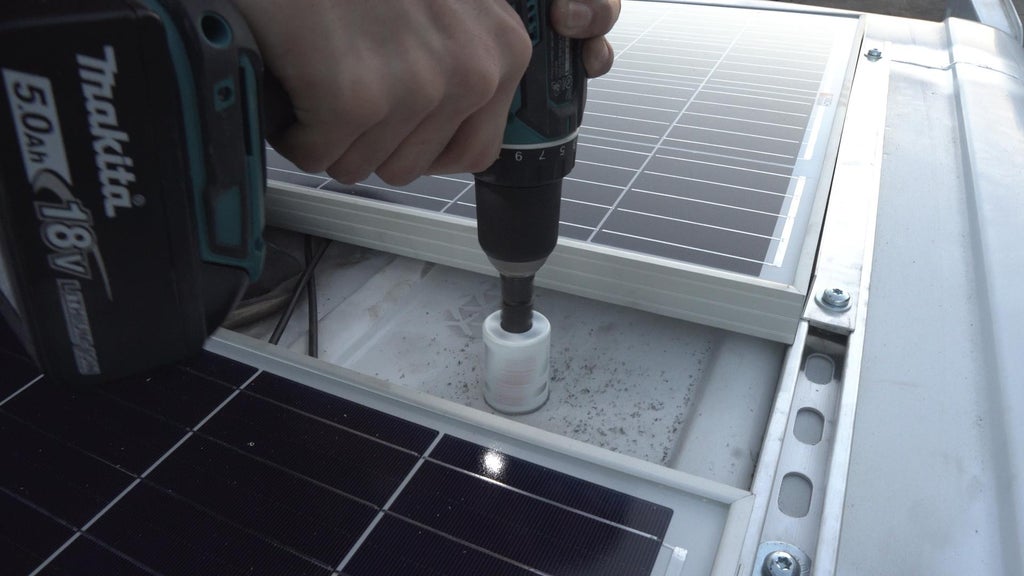
Once the rails were fixed to the roof, we placed the panels on top, aligning the oblong holes on the brackets with the channel nuts. We used a parallel cable harness adapter to connect the two solar panels and routed the output connectors between the two panels.
Mounting and solar panels
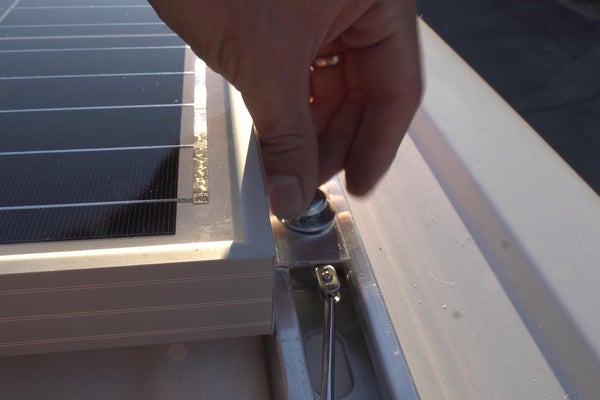
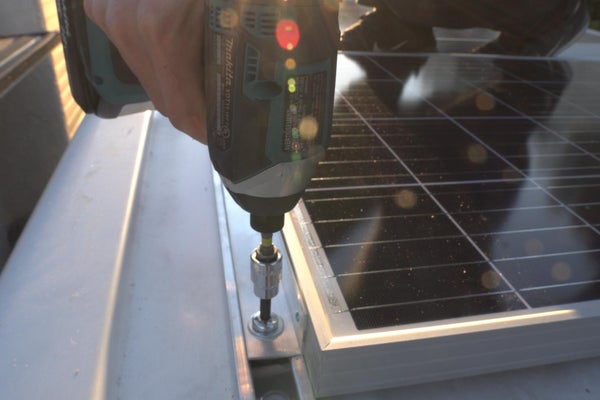
Since the mounting bolts were a bit short, we used a magnet to hold the channel nuts high enough for the bolts to catch some threads. We also used blue Loctite on these bolts and tightened them with an impact driver.
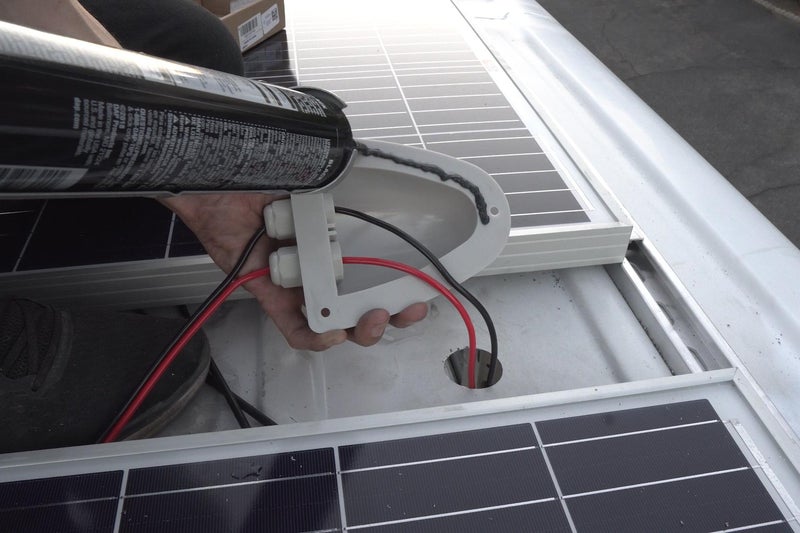
Installation of the cable gland
We chose to place the electrical area towards the middle of the loading zone, so placing the cable gland between the two solar panels was the best location for our installation. We used a 1.25" metal hole saw, cleaned the edges with a file, and sprayed the raw metal edges with paint.
Sealing and mounting the cable pass-through
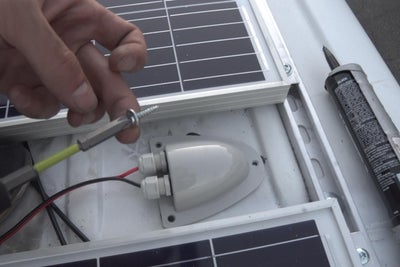

We installed MC4 connectors on a 12-gauge wire to connect to the parallel harness and passed the wires through the cable gland. We will go into more detail about the electrical setup in another article!
To seal the contact surface, we generously used silicone sealant along the flange and used self-tapping metal screws to fix it to the roof.
Admire the work!
And there you go! The installation was a bit laborious but in the end, it's a valuable investment.
If you liked the project, don't forget to share it. Comments and feedback are always welcome.
Materials needed to install a roof fan and solar panels on a Campervan
- 40 x 40 fan for Campervans
- 200W solar panels
Aluminum roof rails - Bolts, nuts, and rivets
- Tools: drill, jigsaw, screwdriver, etc.